Showing posts with label Eat Locally. Show all posts

Friday, January 1, 2010

Eggs with Kale and Garlic

My favorite way to eat the fresh eggs from our eight hens is a Kale Scramble. Love it! Love it! Love it!

Make your basic recipe for scrambled eggs: Eggs, Salt, Pepper and a splash of Milk. Set aside.
Meanwhile, drizzle olive oil in a skillet and heat over medium low. Add in chopped garlic and heat until soft. Then add in salt, pepper, red pepper flakes and chopped kale (fresh from the garden, even in winter months).
Toss until the kale is bright green and tender.
Pour in your scrambled egg mixture and gently fold in the eggs as they firm up on the bottom of the pan. Don't over stir. YUMOLA!

Wednesday, November 4, 2009

Hostile Takeover

I was only able to catch one hen on this swing set on my camera, but there had been five! This shot is from a few weeks ago. Since then I've tried to cut their wings three times, as they'd even gotten into my fenced in garden! Still, every afternoon, I find a few of them roaming around outside of their fencing. So, today I have a neighbor who also has hens and has just successfully trimmed his hens wings, coming over to help me. My hens are out of control. The little whipper-snappers.

However, they have started to give me some good gifts . . .
I don't think my Barred Rocks are laying yet, but my New Hampshire and Rhode Island Reds are just starting. My champion layer so far is my New Hampshire Red, Pearl. Named for her pearlized colored legs -- they are supposed to be yellow at this young age.

Friday, October 16, 2009

Extracting Honey

Last Friday was my big moment . . . I had the opportunity to go to a friends house (and fellow bee keeper with 6 hives) to use her extractor just before she extracted honey from 8 honey supers (x10 frames each = 80 frames of honey!) As you would expect, I brought along my camera to document the momentous event . . .

Here is the inside of her very nice electric extractor. A lot of extractors are of the cranking variety - which is a lot better than no extractor. But the electric one sure was nice!

First, you have to remove the wax capping that the bees build on top of each cell filled with aged honey. This was a very small splash of honey on one particular frame, but it's a great picture of removing the cappings. You slide the angled metal comb just under the cappings, lift it off, and dump the gooey piece of wax into a bucket.
Here is my friend Diane helping me with my frames.
Using this comb like cappings remover is slow business, but it generally damages the comb that the bees build the least. There are heated knives and slicer things that you can use, but they cut into the comb more than this small hand-held number.
And, here I am!
Diane had everything set up nicely. As a bee keeper in her 5th year, she has gotten this project down to a science. The plastic sheeting was a great idea. She also put some pieces of cardboard down on the ground between the table and the extractor to catch drips. If you don't put some effort into creating a good system, I could see how this would be a HUGE mess! As is was, it was pretty dern sticky!
Here are all of my frames sitting in the extractor. The extractor spins at a high speed, pulling out the honey using centrifugal force. Then, the honey drips down the sides and out through a spigot.

Diane tipped the extractor when it was done spinning to get all of the honey to pour out of the spigot and into my bucket. I used a strainer this year, but next year I may try making the raw honey that is not strained -- and then is creamed in some way. At least I'll try to do some that way. That honey is supposed to be even better for you.
Look at all of that honey! When it was all said and done, I ended up with about 1/3 of a 5 gallon bucket worth of honey. This will have to last me through July of next year. With all of the baking I do with honey, my granola, yogurt and tea I will probably end up buying some in the end. But, my harvest wasn't bad considering I had two swarms this year!

Wednesday, October 14, 2009

Hen Bliss

I can't imagine there is a better day in keeping hens than the day you find the first egg. After 21 long weeks, our moment finally arrived! A wee little egg, found yesterday morning. The first eggs that young hens lay are small. We have plastic Easter eggs in their nesting boxes to encourage the hens to lay there.

For breakfast today we will cook up our lonely egg for the boys and split it. It's gotta be good. I'm hoping.
We had friends visit the other day . . .
and they fell in love with our hens.
Give us an afternoon with your kids . . .
and we'll have them begging for hens of their own!
Incidentally, we received another wee-little-egg today.
Wonderful.

Friday, May 1, 2009

Bees, Baseball and Pizza Pie

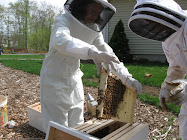
Before I get to the nitty-gritty of going into one of my hives yesterday, let me first present to you my adorable assistant Ripley. Can I just tell you that this was his natural pose? I just told him I was going to take a picture -- and this is how he stood. He loves the camera, just like his Avo (Grandfather in Portuguese). I had to go into my hives in the middle of the day, so Ripley was around. I just had him sit by the garage at a safe distance away. He really didn't need the whole get-up, but he was eager to have a bee suit like his older brother. So, I got out a white dress shirt and Victor's veil and -- Voila! Pleased as punch (as you can see).
Now, the nitty-gritty. Yesterday's task was to go into each hive and check to see that the queen had gotten out of her cage through the soft candy plug (consistency of salt water taffy - but not stretchy) that I'd already poked a hole into with a large nail to help her attendants dig her out. If she was still in there, I was supposed to pry open the cage (over the hive, so as not to lose her!), set it down on top of the frames and watch her crawl out. Although she can fly and all, that's really not her main thing. Unless you drop her or squash her, she will happily go into her hive to do her work. These honey bees have a mission. They have work to do! The other thing I knew I'd probably have to do is take out / off some burr comb, which is comb that the bees build in areas they are not supposed to. They will fill up any open spaces with comb. Because of the queen cage, my frames were askew so I knew this was a possibility. Okay, so that's what was supposed to happen.

Now, let me tell you what did happen. I got myself and Ripley all suited up. Ripley took his safe place back by the side of the garage and dutifully sat down and watched. I told him, no talking or moving. He's a very mellow reliable 4 year old from that perspective. Check. Got my smoker stoked and lit. I don't know how good a job I did with it. The thing is, all of these tasks are so foreign and new. Every move you make feels like you've been plunked into Saudi Arabia (a country with a foreign language and culture I've never been to or experienced first hand) and are expected to function properly. So, I got all of my props - hive tool, bee brush, smoker, more fuel for the smoker (pine needles) and I went over to the right hive (still need names, any suggestions?). 

You always approach your hive from the side so you're not in the line of traffic (bee line? :) ). Did that. Check. I puffed smoke from my smoker into the entrance and then as calmly as I could muster I took off the rock, the lid, the top box and feeder. There were bees sucking away at the sugar water in the feeder -- not knowing what on earth to do (being a skittish novice) I just slowly put the thing down and hoped they crawled out. At the time I didn't even think to put it on the ground right side up, or to bee brush them off. Can you say overwhelmed? And I hadn't even opened the actual hive body yet! 

So, then I went about taking off the "inner cover" which is this thin (5/8"?) top that covers the frames where all the bees are busy in the frames. When I lifted that cover off I immediately felt and said quietly out loud "Oh my gosh, I don't know what I'm doing. I have no clue. What am I doing in here?!" (Not to mention a few unmentionable sentences.) So much for positive thinking and positive 'self talk'. You can read all you want and go to every single bee class (like I did) and still feel totally inept and overwhelmed at opening up that hive. In reflecting on it, I think the thing is -- it's simply unnerving to go into a buzzing hive of bees at first. When I pulled the inner cover off there was this large piece of burr comb stuck to the underside of it. It looked like the dorsal fin of a dolphin -- every millimeter of it was packed with honey bees. I just froze. Okay, now what? What to do? I grabbed my smoker and puffed a few puffs into the hive and onto the comb. Not one bee moved. Okay, now what? Uhhhhh, pry off the comb (which is very easy to do, no 'leverage' required). I got out my hive tool and pryed it off so that it dropped gently on top of the frames with the other bees. Then, I placed the inner cover on top of the other box to the side. I turned back to the hive and slowly picked up the burr comb. I tried to give it a little shake. Nothing. All bees stayed put. Again, not knowing what to do, I decided to grab my bee brush, which looks like a very soft, long 'haired' dust pan brush. I brushed the bees off. That worked just fine. But the bbbbbuuuuuuuzzzzzzzzinnnnnnggg got louder. They didn't like being brushed. Who would, right? Even Benjamin and Ripley complained. I puffed the hive with a little smoke. (maybe I should try that with my boys?) I don't know that the smoke did anything . . . it was effective when I had 2 or 3 bees come at me -- granted I had the full on bee suit so they couldn't get to me if they tried, but I smoked them away anyway. 

I put the burr comb to the side and then looked at the queen cage wedged in between the frames. It was packed with bees all over the outside of the cage. They want their queen out! I could see that the hole was bigger. I held onto the little cage and pulled it out. I could still see (sort-of) through all of the bees clinging to the outside of the cage, that there were still bees inside the cage. I didn't know what to do. I felt like the hive was already mad at me, even though I felt like I'd done what I was supposed to and I didn't know if I should proceed. I was supposed to pry the little wire mesh off the cage and allow the queen to crawl out . . . but the thing was covered in bees. I shook it. I smoked it. Nothing. I just didn't know if I should bee brush them off. They were teeved at me as it was. Can you bee brush the queen cage?? That will really get them mad (I guessed). No knowing what to do. I just buttoned that hive back up. I put the queen cage back in it's place with all of the bees crowding on it and closed her up. It's one thing to not know how to bake bread and to get through it by trial and error. It's a whole 'nother thing to go into a buzzing hive and feel clueless. Overwhelming. 

I immediately called my friend Diane the beekeeper and talked her ear off. Poor gal. Thank God she's a nurse. She calmly talked to me about the whole mess and encouraged me and told me (in the end) to try going in tomorrow. I took that advice and ran with it! After the fact I felt like I'd accomplished nothing and had been a complete and utter failure. I've never done drugs, hardly ever take even aspirin -- but I was thinking that right about then a Valium would have been helpful. I was a mess. 

In hind sight, and thanks to listening and encouraging friends, I can see that I did learn something by going into my hive. This was my main accomplishment. Learning. But it was tough unnerving learning. Unsettling. The bottom line was not knowing what to do moment to moment. When Diane had been by my side during the install, I was totally calm. I felt comfortable even! And there were many more bees just flying around not knowing where they were or where to go. Fear of the unknown. Like walking into Junior High for the first time, but with more bbbbuuuuuuuuzzzzzzzzziiinnnnggggggggg. 

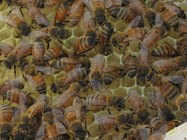
And, I also removed a large piece of burr comb. Deep in each cell glistened fresh nectar (or sugar water) that the bees had put there. Here it is.  Neat, huh? Today I am going in again. Pray for me. 

Incidentally, I asked Ripley afterwards if he found watching overwhelming or fun and interesting. He said "fun and interesting". So, that's good. At least he enjoyed it.
On a completely different note, Ripley had his very first T-ball game last night. There was a mix-up with his uniform shirt, so he didn't have one, but thankfully that didn't bring the tears. I was worried.
Here he is in the outfield at the ready -- in the white shirt.
Here he is glowing on third base -- having the time of his life.
Afterwards, I made two variations of asparagus and goat cheese pizza. I didn't have a recipe, so I was winging it. It was very yummy, but I don't know if it was 'perfect'. The first one has garlic and olive oil on the dough -- I cooked that for a few minutes, then added the asparagus. Cooked it for a few minutes, then added the goat cheese and red pepper flakes. 
This one I put a thin layer of red sauce on the dough. Experimenting with pizza is a lot easier than experimenting with honey bees - - just so you know.

Sunday, April 5, 2009

Our Progress towards Sustainability

There are two books that started me on this journey of sustainability. Taking responsibility for my own choices and how they impact our earth, recognizing that collectively we can make a difference. 

The first is Serve God Save the Planet, by Dr. Matthew Sleeth. Where he challenges the old view of Christians that there was little need to care for the earth and points out that in the beginning God did entrust the earth to our care. And, when we sabotage land and resources that others depend on for life, that's not really loving our neighbor . . . is it? Ignorance is not a "get out of jail free card" we should be responsible and learn about how the choices we are making are effecting the lives of others. For example, have you ever researched the impact of unsustainable coffee farming on their local communities? Suddenly that Folger's doesn't taste very good . . . even if it's cheap! 
Dr. Sleeth writes: "Serve God, Save the Planet is meant to elicit personal accountability rather than political change. Its lessons are meant to teach individuals, families, and communities not much larger than a congregation; and yet it looks at larger issues because they profoundly affect each of us."
"I am convinced that when the church becomes fully engaged in the problems of creation care, we will overcome seemingly insurmountable odds. As all those who consider themselves people of faith grow in their understanding that God holds us accountable for care of his creation, we will begin to see positive changes on an unprecedented scale."
It was in this book that I learned about hanging out my laundry to dry and the environmental importance of growing our own food. Then . . . 

I read Animal, Vegetable, Miracle by a favorite fictional author of mine, Barbara Kingsolver. It documents her family's journey to eat local food that they either grew themselves or purchased from local farmers. Why? What is the point? The bottom line is that factory farming is destructive to our environment and lowers the quality and taste of our food. In addition, schlepping all of our foods from all over the world is a huge waste of fuel and a big contributor to pollution. This was a profound book for me. Eye opening. I loved it. After reading these two books I started changing . . . and planning! 
<span class=

So, how are we doing? Here is our progress:

We started composting
We started recycling - everything!
We put in a large back yard garden, eliminating a large plot of grass that was largely unused and had to be mowed, eliminating mow time and gas usage.
We have made an effort to grow a variety of things that are "ready" at different times of the growing season and that "keep" -- this year is my first effort at growing winter squash, and last year my leeks were a huge success! The garlic I planted last fall is looking good so far . . . 
We planted perennial plants like asparagus, strawberries and rhubarb.
We put in a small orchard including 3 apple trees, 2 pear trees, 2 peach trees, 6 blueberry bushes, 1 apricot tree, 1 cherry tree. 
We tamed and pruned a wild blackberry patch.
We will be planting a new raspberry patch.
We will be keeping our own honey bees, which will help with pollination (a bit of a problem last year) and eventually will provide us with local natural honey! Our bees come on April 27th!
We started buying milk from a local dairy, with an old fashioned milk man and glass bottles.
We purchase our pork and beef almost exclusively from a local Rehoboth farmer.
We purchase our eggs from another local Rehoboth farmer, large beautiful Rhode Island Red eggs.
We started making our own household cleaners without all of the nasty chemicals that come along with the store bought varieties -- plus the savings has been huge. 
We hang our clothes out to dry -- unless I have a major back log, which I've been struggling with recently (and our electric bill shows it!). 

How is your journey? 

Friday, March 13, 2009

Eat your heart out baby!

Now, I don't mean to make you other northerners jealous or anything (well, maybe a little), but take a look at what I harvested from my little home garden in the second week of March:
Arugula and Mesclun Greens from my cold frames . . . 
Winter hardy leeks mulched in my garden . . .
Local Rehoboth Eggs (Rhode Island Reds)
Don't you just love the variation in size?
I wish I could say they were from my chickens . . . but alas . . . 
Leek and Cheddar Quiche
Arugula and Mesclun greens 
with lemon juice, olive oil, Portuguese red pepper sauce, salt and pepper.
Now THAT is a great, healthy meal for the family! 

The quiche recipe I always use is a good old Fannie Farmer basic quiche recipe where you can add any vegetable of choice to the recipe depending on what you have on hand . . . which is great in the summer if you have a vegetable garden! You just roam around outside to see what's available for the pickin'. I need to get the remaining leeks out of my garden (they are scattered throughout) so I will be ready for new seedlings in April and May! 

Basic Quiche Recipe:

Prepare one oil Pie Crust - get the recipe and instructions HERE.

Partially bake the crust (of course with quiche, you only make the bottom) prick prepared crust in pie plate with a fork several times. Then bake at 425 degrees F for 15 minutes. Pull out of the oven when it's done (carefully, so you don't damage the edge of the crust).

Meanwhile, while the crust is baking prepare your quiche filling.

Saute 2 leeks (rinsed well) Slice lengthwise several times, then chopped into 1/8" slices. Rinse chopped leeks again in a fine colander. Then saute in 1 T of butter (or olive oil) and a sprinkle of salt. If you want to use another vegetable, use about 1 cup of chopped veggies - like broccoli, spinach, asparagus.

Filling - Mix into a large bowl (if it has a pouring spout, all the better)
  • 4 eggs, slightly beaten
  • 2 Cups whole milk (recipe calls for light cream, but I've used the milk and it works well)
  • 1/2 t salt
  • 1/8 t nutmeg
  • pinch cayenne pepper (don't worry, your quiche won't taste spicy)
  • 1 1/4 C grated cheese - sometimes I use a little more. (For my leek quiche I used cheddar cheese and a little freshly grated parm cheese -- simply because that's what I had on hand.) Saving some (maybe 1/8 C) to sprinkle on the top after I pour the egg mixture into the crust.
  • Sauteed veggie of choice - 1 Cup raw
Mix the above, then when your crust is precooked make sure your pie crust is on a rack in the oven with the rack pulled out. Pour the egg mixture into the pie crust, sprinkle the reserved cheese on top, and then gently slide the quiche into the oven. 

Cook quiche at 425 degrees F for 15 minutes, then lower the temperature to 350 degrees F and bake for 30 minutes more - until the egg mixture has set in the center of the quiche. 

Yum. Yum. Yum. 

Tuesday, November 11, 2008

Homemade Cleaning Supplies

I realized that I don't have a succinct link page set up for homemade cleaning supplies. I started by making my own homemade laundry soap. Who doesn't cringe at the expense of purchasing cleaning supplies when you go to the market? I did. Well, you can save big time by making your own and contrary to what you might think, I really doesn't take long. Plus, if you'd like to be kind to your environment -- these are all earth friendly recipes. Recently I was out with a girlfriend of mine -- the waiter was washing down a table next to me and I nearly gagged on the fumes from the detergent spray! I have gotten used to having natural earth friendly soaps and cleaners in my home. What a difference.

Window Cleaner: Put 1/8 cup white vinegar to 1 cup water into a recycled spray bottle -- shake to mix it up and you're ready to go! Frankly, I don't measure the vinegar -- I just glug a bit into a spray bottle, fill the rest with water and call it a day -- it works very well and doesn't fume me to death. (Ok, I'm being a wee bit dramatic -- but try using the vinegar spray for a month then go back to Windex and you'll see what I mean.)

Homemade Furniture Polish: 2 t Olive oil, 1/4 C white distilled vinegar, 20 drops pure essential lemon oil, and water. Put olive oil, vinegar and essential lemon oil into a recycled spray bottle 22 ounces or so. Then, fill up to the top with water. Voila! Your done. Shake, spray and polish.
(Thanks Tanya for the above info)

Simple Powdered Laundry Soap:
As a footnote when you grate the soap, grate it small. I understand that you can use Dr. Bronner's bar soap. This soap is fine for front loading washing machines.
Link it at Raingarden
here
Link it at Plain Old Kristi here

Liquid Laundry Soap:
This is the soap I'm using at the moment. It's working very well with my front loading washing machine and it's very inexpensive.
Link it at Plain Old Kristi
here

Dishwasher Soap: I'm using this now and let me tell you it's maybe 10 minutes to make (including getting out the boxes of ingredients) it's very inexpensive (again) and works well. I can't be quite as aggressive (I don't wash my dishes before putting them into the dishwasher -- don't get me started! Just go ahead and wash them ... ) in loading my dishwasher, but for the price and the environment (most regular dishwashing detergents still have phosphates in them) it's worth it. Link it at Plain Old Kristi here

To clean my house from floors to bathrooms I use Dr. Bronner's Sal Suds. I've been using the first container of it that I purchased for six months or so and I've hardly made a dent in it. You use only 1 t per gallon of water. I also made a spray out of it for the shower and bathtubs. About two teaspoons in a spray bottle and fill the rest with water -- that's it. Very inexpensive.

Now, to more newsy things ...

My friend Michelle came over today to teach me how to make egg rolls which she'd learn how to make from her Filipino Sister-in-Law. I in-turn taught her how to make my pie crust -- which she'd been struggling with. (I think I need to make a video b/c she's not the only one. Once you get the hang of it though, it's easy, yummy and better for you than butter.) What a fun day we had -- cooking away while our children (who happen to be almost exactly matched in age and adore each other ... wonderful!) played both inside and outside on this beautiful fall Veterans Day. For dinner, to go with the egg rolls (which were made with the local Rehoboth hamburger that I purchased last month) I will be making fried rice with the broccoli and bok choy that I just picked in my little garden. Yumola!


AND ... Our new wood stove insert was installed today. Wood stoves today have to pass new emissions standards, so a wood stove is actually far more efficient and environmentally friendly than using your fireplace. I'd had it last year when our oil bill went close to $600 in one month with the thermostat set at 66 degrees! As we speak, it's 71 degrees inside the house and in the 30's outside. Yipee. I turned down my thermostat to 60 degrees!


Ok, time to get busy. Enjoy the pictures!

Monday, October 27, 2008

Buying Locally

Some exciting things are going on around here (aside from the fact that I was ... or rather my garden was ... attacked by deer last night ARGH!!!). Although my garden wasn't quite as productive as I was dreaming it would be this summer -- for the past year I've been working on changing what we buy and especially what we eat. It was my desire, after reading Serve God, Save the Planet, to begin to make better choices to take care of the earth entrusted to us by God. Then, I read Animal Vegetable Miracle (thanks to RainGarden) and started getting even more serious. Since then this is what I buy for food:
.
Eggs: From a farmer less than five miles from my house. $3.00 a dozen for free-range, totally natural -- no junkola given to the poor chickens -- Rhode Island Red eggs.
.
Milk: From Monroe Dairy delivered 2x's a week with the old fashioned glass bottles that they reuse.
.
Vegetables: Since summer -- largely from my garden with a few exceptions like garlic and onions. Also, carrots were getting attacked by Bambi, Thumper and the E.B. so I had to supplement. Next year, in addition to considering a fence, I will plant more carrots, and I planted garlic ... maybe next fall I will try onions?? I was also reminded by RainGarden about purchasing local produce that stores well over the winter in larger quantities directly from farms for a good price. I was late trying this, but did get a hold of Butternut Squash in addition to a bunch of apples and eggplant (which don't store very well, so we have to munch on those pronto!) I will do more research and prep for next year. After Halloween I will see about getting a hold of some cheap pumpkins. I've been making pumpkin bread and pumpkin jam.
.
Beef: After watching an episode of OPRAH on conditions inside of pig, chicken and cow "factories" while whipping dinner together one late afternoon -- I recommitted myself to contacting a local couple (among several here in Rehoboth) who raise their own cattle and sell the beef to local customers. I'd done the research already, I just hadn't made the call. They didn't have a lot available just then, but I did get a bunch of hamburger, some stew beef and some tenderloin. Again, these happy looking cows that I saw hangin' out among the trees mostly eat -- GRASS! You know, that stuff that they find in the field while they are roaming around. And, of course no antibiotics, etc., etc. Cool, eh?
.
Bread: I've committed to making my own bread. Both sandwich type bread and also quick breads. Quick breads are great because they are perfect for the boys to pack in their lunches. (Nope, I don't have wrapped, prepackaged, snacky things in their lunch boxes ... and most things are either in a glass container, metal thermos, or wrapped with waxed paper that I then throw into my compost bin. I also recently purchased mis-matched silverware from the Salvation Army that the boys can bring to school in lieu of plastic -- and I don't have to worry about them losing it -- no biggy. Incidentally - .25 cents per fork or spoon.) OK BACK TO BREAD: I contacted (after reading one of Peter Reinhart's books) a local bakery that has a lot of organic breads and other yummy treats to see if I could purchase some of their flour. "No prob!" the guy said. So, I marched down (drove rather) and picked up my two big ole' bags of flour. One french styled white and one organic whole wheat. Half the price.
.
Jams: One thing I do have plenty of now is Jam. Ripley is a committed P,B & J type of guy so I decided to make my own. Not only do I know what went in there -- but when you are buying organic strawberry jam from Whole Foods for example, it's expensive! Although I didn't calculate the cost out, I'm sure I saved plenty.
Herbs: Over the summer I purchased a food dehydrator. After failing to produce successful sun dried tomatoes in our humid southeastern Massachusetts weather, I bought one. I've made sun dried tomatoes, dried apples -- that I used in my granola -- and now HERBS! Isn't that cool? Now, talk about savings -- herbs are outrageously expensive. So far I have dried lavender, rosemary and dill. I still have a little time to do others like Thyme, Oregano and Parsley before they get harmed by the cold weather.
.
Soaps: This doesn't fall into the "local" category really, but it is a big saver on money. You can make your own Laundry and Dishwasher soap that is earth friendly. So, I recommitted to doing that. I'd made some dry Laundry Soap before, this time I tried a liquid version. The Dishwasher Soap is incredibly easy. Kristi does a great job with her instructions. Click HERE for Liquid Laundry Soap, HERE for Powdered Laundry Soap, HERE for Dishwasher Soap.

Sunday, September 14, 2008

Fall Harvest

The apples from my three new semi-dwarf apples trees were ripe enough for picking and I decided to go ahead and harvest them. The main reason being -- the cute little things had gotten this far without being totally destroyed by bugs, mildew, rust, scab, squirrels or deer -- let's hurry up and pick them before their luck runs out. This came to my mind yesterday because I awoke to find one of my three sugar pumpkins that pollinated with chipmunk teeth marks! Grrrrr. No big harm done though thankfully. I just need to make pumpkin something-or-other soon. Needless to say, I picked my three little pumpkins before further damage occurred. Speaking of pollination ... have I mentioned that I'm seriously considering keeping bees? (Another idea my sister-in-law Tanya has been tantalizing me with over the past year ... as in "Have you ever considering keeping beeeeessssss???") I have two friends in town who keep bees that I've started peppering with questions. With fruit trees and a big garden, honey bees with help with pollination and produce more fruits and vegetables. In addition, you can reap a harvest of honey. I'll keep you posted!


Thursday, September 4, 2008

How to Make Your Own Greek Yogurt at Home

No, I'm not Greek. However, Greek Yogurt is the one plain yogurt that I can totally enjoy like I'm "splurging". And, I figure, if you can make your own Greek Style Yogurt at home, you are really saving money. Not only do you save money, but you also save the environment by eliminating all of the use of plastic -- even if you do recycle it, plastic is rather toxic to recycle (although better than not recycling!). All the better to put your homemade yogurt into glass containers that you have saved ... like nut butter jars! Anyway, here is what I did:
.

First, I got started and inspired by The Real Food Revolution blogger. Check her site out.
Second, my first effort was a failure. Hey, it happens. I've made some bad bread and pie in my day too.
Third, I did some more research to see what I could have possibly done wrong and this is where I landed:
.
How to make your own Greek Style Yogurt
.
You need:
  • 1 Gallon Milk
    About 1/2 cup (or less) scoop of plain yogurt for your "starter" (must have "live active cultures")
    1 Large Pan large enough to handle the gallon of milk
    1 Candy Thermometer (or any thermometer that can measure liquids from 100 to 200 degrees F, a candy thermometer is nice b/c it clips to the side of the pan.
  • 1-2 heating pads
  • 2 bath towels
  • 1 large colander
    1 large bowl that the colander can fit into
  • 1 large square of muslin, cheese cloth, or in a pinch a thin pillow case
  • 2-4 very clean large glass jars with tops. Most people write that they are fine with jars cleaned very well with hot soapy water -- but you could sterilize them in your dishwasher if it has that feature, pour boiling water into them before filling while the yogurt is in the fridge draining, or actually go all the way and sterilize them in a boiling water bath. Your choice.

Directions (this really isn't hard ... at all -- my long winded-ness just makes it seem long and labor-intensive. It isn't!)

  • Set 1/2 Cup plain yogurt starter aside at room temperature
  • Put the gallon of milk into the pan and heat it to 185 degrees F over medium heat to kill of any "bad" bacteria -- stirring from time to time to prevent the milk from sticking (or worse) burning on the bottom of the pan.


  • Remove the pan from heat -- and if you'd like to move quickly -- put the pan into an ice water bath in your sink with the top of the pan on -- thermometer sticking out of the side until the milk is brought down to 105 degrees F. If you use the ice water bath method it's really very fast. Otherwise, stick the pan on the counter and wait.
  • Stir 1/2 Cup of the room temperature plain yogurt into the milk - well.
  • Turn your heating pad(s) on medium heat and set them on the counter.
  • Take your pan of 105 degree F milk with yogurt starter stirred in and put it on top of the heating pad. I put another heating pad (set on medium) on top of the pan (with the top on the pan, obviously), but this might have been overkill.


  • Then, cover pan / heating pads with two towels, tucking in the ends to avoid drafts.

  • Let sit for 12 hours -- over night is great. (I made mine during Ripley's nap -- set it to brewing at 3pm and woke up after a good nights sleep at 5:30am - perfect!) The longer the yogurt "brews" the better it is for you -- that good bacteria really gets going. As you pass the 12 hour mark the yogurt is supposed to taste tarter (not necessarily a good thing in my book). I "brewed" mine for 13 1/2 hours (because I was sleeping) and it isn't sour or tart at all -- go figure.

  • In the morning - line your colander with your clean cheese cloth or muslin and set the colander inside a large bowl to catch dripping liquid -- or Whey.
  • When you take the top off your pan and peek in, the yogurt should have formed into something that looks like a custard. There will also be a clear yellowy looking liquid on top and around the sides -- this is your Whey. (as in Little Miss Muffet ... you know) Pour as much Whey off as you can without dumping out your yogurt -- keep the Whey and use as you would buttermilk for baking, or if you're feeling adventurous -- homemade Whey Ricotta.
  • Dump the sloppy yogurt into the cheese cloth / muslin that's inside the colander. Pull up the sides of the cloth, twist and tie a knot on the top so that the cloth is tight around the blob of sloppy yogurt.


  • Put the Yogurt, cloth, colander, bowl into the fridge for 2 hours. I poured the Whey out of the bowl a couple of times to be sure it was draining well, but that might have been overkill.
  • Spoon and scrape the yogurt the yogurt off the cloth and into clean jars.


  • Chill in the fridge
  • Serve with honey and homemade granola.

    My sister-in-law Tanya (a Greek Yogurt connoisseur) taste tested and agreed that it was .... YUMOLA!!
    Incidentally; Ripley, Benjamin and I are downing homemade granola and homemade yogurt like mad ... can you believe it?! Ripley, eating super good for you homemade granola? He even asked for it for lunch. I'm going to have to make more next week at this rate -- I'll take pictures and update this post. Good Luck!