With the warm weather we have had over the past several days with highs in the 50's and 60's, we've finally managed to rid ourselves (again) of all of our snow. To have a snowless weekend with warm spring-like temperatures to work outside and fiddle with the yard was wonderful. A glimpse of things to come.
I drafted Victor (who has been away on a business trip for four days) to prune back our wild black raspberry patch with me. We have never gone through the entire patch and cut the dead wood or carried out the old branches. When I'd had some landscaping done very early in my time at our house, the landscaper asked if I wanted him to leave the wild black raspberries. "Sure" I said. They are aggressive whipper-snappers, like mint and strawberries, so we'd beat them back as they crept into our yard and threatened to take over the place. But they had never been properly pruned. Until last year we'd never had a decent showing of black raspberries, and I was starting to regret having kept them. No longer! I read up on how to prune them, and we went to work.
Now, this tidy patch might not look impressive to you . . .

But when you look at the pile of dead wood we pruned away and hauled out of the patch, suddenly you realize what we accomplished yesterday afternoon! Wow! It's safe to say that we took out more than we left standing. Hopefully this year or next we will see a large reward for our work.

Below is our side yard - there are trees off to the left. In an effort to seek out more growing space, I've decided to use this mulchy area to grow my zucchini, pumpkins, winter squash, yellow squash, watermelons and cantaloupe. My plan is to dig large holes, fill them with loam, compost and peat moss (my leaf mold still isn't ready) and create mounds for my sprawling plants to grow. They can spread all over the mulchy area without disturbing my smaller garden that doesn't have room for such things. Clever, eh? I hope they will be happy in this location.

Here are my spring garlic shoots!

Don't they look promising?
All three varieties have sprouted now, every four inches along 3 long rows. Exciting!

Here is the happy arugula growing in my cold frames.

And my Mesclun Greens!

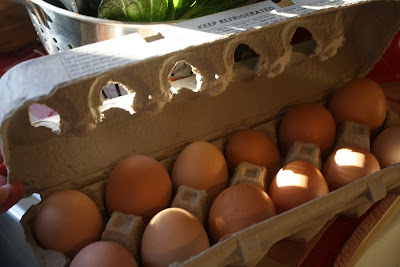
Here is the little farm where I get my local eggs.
Isn't this chicken coop adorable?
We'd just gotten a lot of snow the day before, so the chickens were all "cooped up"!
Normally, they are allowed to roam around on this small fenced in field to the right.
Maybe there are 30 of them? It's quite a few.
All Rhode Island Reds. Large brown eggs with gorgeous bright yellow yolks.


 Here is my progress as I was gently shoveling off the mounds of snow.
 And then, alas, some glass fell into my mueslin greens. I'd put this pane upside down without thinking of the consequences. When the glazing fell off, the window was no longer being held onto the frame. Ordinarily this wouldn't be a big deal because of the wooden lip that the glass sits on. But, I put this frame on upside down. Ugh. I still have yet to fix this problem -- temporarily somehow. I think we may use Plexiglas glued or nailed to the top. For awhile I had cardboard covering the hole. Now I have a big piece of Styrofoam that came in some packaging laying on top and secured with large stones. We are expecting a lot of wind along with 4-8 inches of snow. Isn't this a sad sight?
 On a brighter note, our wood stove is churning along nicely. We have our digital thermostats set to 60 degrees. I start the fire in the morning from the embers still burning from the night before (if everything went well) and get the temp up to a happy 68 degrees or even warmer. All from free wood in our back yard. Sometimes if I can't tolerate the morning cold I bring the temp up to 68 degrees with our furnace, then turn it back down and the wood stove just maintains the temp from there.
 In any case, our first winter oil bill came and it was $156.13 for 71 gallons. For the same time period last year we used 97.4 gallons and using this year's prices we saved $57.81. I just called the oil guy to see if I could get the stats from my two previous bills (because I forgot to document them) and when he found out who I was he said "Hey! Your name came up the other day!" I told him that I'd bought a wood stove insert and he told the story of how he and his brother had been talking about whether or not to come by and fill up our tank -- wanting to be sure I didn't run out in the middle of winter. They decided that I probably didn't need any because the last time they were by I'd only taken 70 gallons -- he had remembered the exact amount -- and he'd seen smoke coming from the chimney and figured I'd gotten a wood stove. Isn't that funny?! I think you're doing pretty well when even the oil guy takes notice! Exciting!


 Benjamin and Ripley take a "play" break from work -- which left to their own devices outside usually includes mud, dirt and water. (Notice Benjamin's knees -- yep, that's my boy.)


