Tuesday, June 16, 2009

Garlic Scape Pesto

What on earth is a SCAPE? I didn't know either. And who came up with that name? Anyway, I have them. Scapes are the flower stems that garlic plants produce just before the bulbs mature underground. If you are growing your own garlic, as I am for my first year ever, it is a common practice to cut the scapes off in order to boost the growth of your bulbs. It's wonderful because it is one more thing that you can harvest from your garden at this early point in the season when all there is, is lettuce, peas, strawberries, rhubarb and last fall's kale (which, is not too shabby an assortment, I must say).
Some say to cut your scapes off before they make a full loop, others say wait until they've made two loops. I split it down the middle and trimmed them off after about one loop -- give or take -- and enough to make my first batch ever of Garlic Scape Pesto. Aren't they a bit odd looking?
To make Garlic Scape Pesto, you pretty much follow your favorite basil pesto recipe and in place of the basil, use the scapes. The recipe I adapted from called for a pound of scapes. My first harvest was just shy of that.
Here is the recipe I ended up with:

Before you start, put water on to boil with 1 T of salt.

Garlic Scape Pesto:
1 lb. of garlic scapes, chopped just a little bit so you can cram them into your food processor.
1+ cups of freshly grated Parmesan cheese - first I use the grater attachment, then the attachment that looks like a propeller so the cheese is chopped fine. 
1/4 cup toasted or roasted pine nuts, chopped. I toast them in my toaster oven until lightly browned. My brother (a pesto fanatic) roasts them in a pan over the stove.
2/3 cup extra virgin olive oil, or so. 
Juice of one lemon (I only had 1/2, but it would have been better with a whole.)
Pinch / Dash of cayenne pepper
1/2 t salt, to taste
plenty of freshly ground black pepper
(I didn't have any basil leaves on hand, but if I did I would have added about 1/4 cup of them just to accent the garlic scapes. You would add them at the same time as the scapes.)

If you want, you can dump everything in together and just pulverize until everything is in tiny bits -- it's fast and easy. But, I don't love the way the pine nuts and the Parmesan cheese get pasty when I do that. So, first I grate the cheese, set aside. Chop the pine nuts with a hand chopper, set aside. Put the garlic scapes, lemon juice, cayenne pepper, salt and pepper into the food processor and chop until the scapes are finely minced. Then, slowly drizzle the olive oil into the food processor while it's running. Run the food processor for about 10 seconds. Personally, I like to mix in the Parmesan cheese and pine nuts in by hand (so things don't get pasty), however you may be content to dump them into your food processor pulse it a few times just to combine everything. 

Some folks swear by putting a ladle of pasta water into the pesto before tossing it with your pasta. This makes the pesto stick nicely to the pasta. Sprinkle with Parmesan cheese. 

This makes a good amount of Garlic Scape Pesto. We cooked a pound of pasta and still had some pesto left over. It was delicious. Victor, my food critic, said that it was very good. And then added a few minutes later that it was really, very good! Enjoy.

Monday, June 15, 2009

Butts Up!

I went to my friend Diane's house on Saturday to see her work her seven hives. That's a lot of hives! She was speedy and decisive working in her 5th year of bee keeping. A very different experience from hanging out with new-bees where we spend several minutes on each frame. You can imagine with so many hives that it would take an eternity to work your bees if you took that much time on each frame! 

Her bees were very well behaved, but after working one hive they were ready for us to leave. How could we tell? When honey bees are fed-up with you bothering them, this is the warning they give you:
Butts UP!
Diane told me early on, that if she opens up one of her hives and they give her the 'butts up' right off the bat, she just closes that hive up for another day. 
Aren't they funny looking with their little butts sticking up in the air?
It's a new way of communicating. "Honey, I'm having a bad day. Get lost!"

Wednesday, June 10, 2009

A Battle for Strawberries

I have been at battle with chipmunks again. We don't have guns here, but if I did, I'd use them on these little whipper-snappers. (Jacob, Jon, come on over!) They've been going into my strawberry patch and munching one little 'chip' out of each ripe strawberry they see. I've thrown into the woods the same amount of strawberries I've been able to harvest for US.

I've sprinkled dried blood around the perimeter of the garden (yes, available at garden stores), put up two yard-art owls and created a less than heart filled trap. I'm sorry, it had to be done. If anyone would like to trap them and drive them to Iowa, come on over and be my guest. 

Chit-chatting around the playground after church on Sunday, I learned that there are new fangled bobble-head owls where the heads turn. Heck, I'm willing to try anything at this point.  

Thankfully, we did manage to have four bowls of strawberries and ice cream for dessert last night. Strawberries that I collected like a stealth fighter over several days, picking just before they were perfectly ripe.  Why don't chipmunks eat my weeds? Why don't bugs eat weeds? And why do weeds grow with such vigor, compared to my freshly planted pepper seedlings? 

Thank you for allowing me to vent. We were thankful and thrilled to have the strawberries we did from our very own garden. Aren't they beautiful?

Monday, June 8, 2009

Bubbles . . . A Gift from a Thoughtful Boy

Ripley thought: I love bubbles, surely everyone must love bubbles.
Like The Little Drummer Boy, he offers what he can do . . . as a gift.
to four of our little chicks . . . 
roaming around outside for the first time.
The chicks loved their field trip.
FYI: Ripley has also drawn a picture for the chicks, that Benjamin helped to tape up in the hen house. Awwwww.

Thursday, June 4, 2009

Garden & Hen Progress

I was hoping that my garden would be a little more 'in balance' this year, being the second year and all. But, I guess it takes longer. I have bazillions of bugs. And I don't mean the good kind. 

Here is damage done to a Portuguese Pole Bean that I planted. The seedling had wilted, so I picked it, and what did I find? A wireworm. Commonly found in gardens that were formally grass. That would be mine. There is not a whole lot to be done about them, except to pick them out when you see them. 
I also have these black bugs -- flea beetles I think. They eat holes in everything. They particularly love my potato plants, my tomato seedlings, my eggplant seedlings, my cucumber seedlings . . . . yep, pretty much anything that's in my garden. They can apparently be discouraged by soapy water spray. I don't know, it hasn't been that successful. 

I also have tons of tiny (a little smaller than the head of a pin) orange hopping bugs that suck the life out of leaves and seedling stems. Does anyone know what these are?  
Well, speaking of potato plants, here is one of my infamous potato towers. As you can see, I've had to put composted leaves, grass clippings, straw, a little compost around the plant stems several times already. You are supposed to do this every time the plant stems are about six inches or so above the compost. Well, it seems that as soon as you compost, they shoot up another six inches. I have to admit, it's a bit labor intensive. Mainly because my compost piles are still a little lacking since I'm only 1 1/2 years into this journey. Let's just hope I'm growing potatoes in these things! I have a total of 17 of these towers scattered around my back yard. I will be either the coolest gardener on the block, or the laughing stock of my neighborhood and my husbands family. 
My strawberries are starting to ripen. If only we could get several warm sunny days in a row.
Please, enough cold rainy days already.
My lettuce, that I planted in mid-March are about ready and are very happy.
We have been eating salad every night because the lettuce that was growing in my cold frames exploded into gigantic heads of spring lettuce. Lovely. 

It doesn't seem that our salad intake will slow up any time soon. But that's a good thing. It's great to be harvesting from my garden so early. I finally let my 2nd year asparagus flower. It was sad to stop picking, but I can see that in the next few years we will have plenty.
Here are the rows of carrots I planted in mid-March. 
Still small, but coming along and so much happier since they aren't being attacked by rabbits. 
Last week I planted a third row in between these two rows.
My sweet peas -- also planted mid-March -- are flowering!
It won't be long now. Towards the end of March I planted another row (behind this one in the picture), so we will get two 'batches' of peas. These will be great in our salads!
And our baby hens, how are they doing, you ask? Well, they are splendid. We had several families over last weekend so we out-placed our chicks to their very solid hen house out back. They're thrilled.

Here is one of our Rhode Island Reds.
Three Barred Rocks and a Rhode Island Red.
One New Hampshire Red (on the left) and Two Rhode Island Reds.
Don't they look comfy?
It's been a little chillier than usual here, so on those nights we've had two heat lamps going to keep them warm. In the beginning -- directly under the heat lamp -- the temperature should read 95 degrees. Then each week as they get more of their feathers the temperature can decrease by 5 degrees. Now we are down to 85 degrees. 

Wednesday, June 3, 2009

A Tea Party for Kids

This isn't your typical tea party for kids . . . it's a tea party with purpose. Our second. My mother invented them to teach her grandchildren the importance of grown-up manners. More than just saying "Plleeeeeeeeeease", the boys are required to honor the ladies by escorting them to the table, pulling out their chairs and pushing them in. There is no grabbing for treats across the table, but each person is offered something in time. Did you know a guest isn't to ask for seconds? Drat. Foiled again. 

Here is the lovely table setting. I love the colorful ribbon running down the center. And the place cards . . . 
My creative, brilliant mother wrote out each persons name in craft glue, then sprinkled -- get this -- crumbled tea leaves on the glue! Is she clever or what?
We were each to bring a treat for the party that the children were to help us prepare. This is a big draw for the whole event. "Oooo . . . you get to have treats and tea before dinner!" Mom got the award though. Again. Here are her cucumber sandwiches with cream cheese and cucumbers cut out with airplane and star cookie cutters. Looking festive, covered in glass. 
The strawberry tarts were fabulous. She used 'refrigerator' sugar cookie dough for the crusts, pressed them into the cupcake tins, used a fork to make 'crimping' on the edges, and baked. I'm not sure what the filling is. Mom?

Did you notice that the strawberries are cut into the shapes of hearts? Awwww.

Chocolate dipped strawberries.
Another part of the tea party experience is that everyone is required to dress up. No, you can't aways wear your velcro sneakers and jeans. There are times when you must wear 'cute clothes' as Ripley calls them. A good life lesson. 

The importance of wearing cute clothes from time to time was driven home when Ripley decided to have the mother-of-all-meltdowns when we required him to wear cute shoes. He is a sports gear guy and much to my chagrin is in love with sneakers. And, he's hard headed. It was a mess getting them on, but we didn't give in. We stood our ground. 

Mom recently purchased navy blazers for all of the grandsons to drive this point home. A boy should be comfortable and 'at home' in a blazer. Spencer, not yet one, will be the proud recipient of all of the hand-me-downs up to age 10. Doesn't everyone need a navy sport coat at 10 months? He does look stunning, I must say.
Here we all are at tea.
Yum.
We made petit-fours from a left over upside down pineapple cake we'd served the night before. Ripley was in charge of cutting the squares (with a little supervision) and I made the chocolate fondant which was very easy. One cup of milk brought to boiling. Remove from heat. Then add in 8 ounces of chocolate chips very finely chopped, and stir until all of the chocolate is melted. That is it. Pour over your cubes of cake. Mine was a tad too thick, but I'm not sure if this was because Benjamin was in charge of bringing the milk to a boil and it took a dog's age. So, perhaps too much steam evaporated? I may add a scant more than one cup of milk next time. Because we were short on time, we just plunked an M&M on top of each one. Left over homemade heath bars chopped up into bite sized pieces also served as another 'offering'. (Thank you Katie!)

Cute.
The traditional 'stair shot'.
L-R: Benjamin, Spencer, Rosalie, Ripley and Reese
After dinner, there were s'mores.
Spencer enjoying a graham cracker with sport coat. Why not?
Victor and Dad.
The perfect ending to a wonderful evening.

Monday, June 1, 2009

Play Date for Bee Keepers

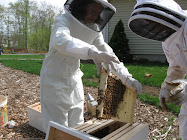
On Saturday three of us from our bee keeping class got together to do hive checks. Not only do you get more exposure to bees and different hives, but you also have an extra pair of hands to take pictures! At my house, both Benjamin and Victor were able to observe as well. (Ripley played nicely in the driveway.)

Sarah has two hives at her house: her hive and long time friend Joel's hive. It seems as though every hive has its own adventure enclosed. Joel's hive has a lot of drone comb, which when capped makes a little bump-out rather than being flat because drones (boy bees) are larger than the worker bees. (And, isn't it funny that JOEL'S hive has more drone comb than ours?)
See the drone cells below? They look like the round puffy end of a piece of popcorn.
Joel inspecting one of his frames.
The string of bees in between these frames is called "festooning".
They hang or string together when creating wax. 
Good little bees.

Sarah going into her hive.
This week Joel and Sarah shook confectioners sugar into their hives to battle the varroa mite (a major problem for the honey bee). We call it "The Sugar Shake". Basically, to take one cup of confectioner's sugar and shake it over your hive either in a thin strainer or flour sifter. Then, you brush the sugar off the tops of the frames down into the hive. We all have screened bottom boards, so when the bees groom the yummy sugar off themselves and each other, the varroa mite falls off the bees and down through the screened bottom board out of the hive. You repeat this every three weeks.
This is just the beginning. A full cup of sugar is a lot. The poor little bees don't look all that happy -- completely covered in powdered sugar.
But, they are pretty funny to watch flying around like white ghosts. 
Here is one on a blade of grass trying to determine just what she did to get herself into this mess.
Now, at last, to my hives. You may recall that last week I put on the second brood chambers on both of my hives. Of course every bee keeper has their own opinion on the subject of when to put on your second brood chamber. Seeing as I am a skittish new bee keeper, I went with the most conservative theory. Which is: When the bees have started building out comb on frames 2 and 7 (out of 8 frames) go ahead and add the next brood chamber. This is for frames with foundation (and not built out comb) which is to say, they still need to make the comb before the queen can lay eggs. The reason for this is: it gives the bees a chance to start building out comb on the upper chamber at the same time as they are finishing the lower chamber. In this way, they wont start to feel crowded. A friend of mine in her first year of bee keeping lost her bees to a swarm in this way. Although, bee keeping is not an exact science, more like an art form. Some bee keepers swear by waiting until they are well on their way to working on the last 2 frames before putting on the next chamber. 

The good news for me was that the bees in my right hive were working at building comb on one frame in the upper brood chamber! The bees in my left hive were just getting started. So, we've made some progress and they have plenty of room. 

Here are the bees busy starting on building comb on their first frame in the upper brood chamber.

In the lower chamber there was a lot of evidence of the birth of new bees. It takes 21 days for a worker bee to be born and my bees were installed on April 26th, my queens released on approximately April 30th, so as of May 21st new bees should be hatching everyday. 

On the left side of the picture below you can see "capped brood" which is the last stage of creating a baby bee where the worker bees enclose the larvae in it's individual cell to finish developing.

When the baby bees hatch, you will see empty comb (see the middle of the picture). If you look closely, you can see a baby hatching out! Can you find it?
Here, I'll help you. See?

I saw both of my queens in each of my hives, and freshly laid eggs. A wonderful sight for the bee keeper. All is well.
The big event during my hive check was removing a very large piece of burr comb that the bees in my left hive build and the queen laid eggs into. I didn't have the heart to yank it out before a good number of the baby bees had hatched out. When I was inspecting this frame, Sarah and Victor (looking on without his veil, again) noticed that this burr comb was dangling from a small attached portion at the top. So, with encouragement from 'the crowd' Victor and Sarah grabbed hold of the burr comb with their gloved hands and yanked it off slowly. It was a bit sad because there were still unborn bees in the comb, but it had to be done. I cleaned up the rest of the area with my hive tool. Now this frame sits nicely against it's neighboring frame as it's supposed to. To get the remaining worker bees off the burr comb, I gave it a puff a smoke, and Sarah gave it a good shake or two. The rest found their way back into the hive after we set the comb on the ground next to the front entrance.