Showing posts with label My Victory Garden. Show all posts

Thursday, April 22, 2010

Grilled Romaine, Asparagus & Onions, and BEES


My girlfriend Vivian has gotten me into this strange dish: Grilled Romaine. 
Sounds odd, I know. But really it's delish!
What to do: Start up the grill. Drizzle olive oil on both sides of a rinsed head of romaine (do your best). Don't chop so much off the end that the head comes apart. Then add salt and pepper. Throw it on the grill.
I'd say I grill it about 5 minutes each side on medium heat. Use tongs to flip over. 
Drizzle a little extra olive oil on top and EAT! Sounds strange, but it's yummy. Throw a few crumbles of feta or blue cheese on top if you like. Lots of freshly ground pepper.
Here are fried onions with braised asparagus fresh from my garden. Just fried up in a little olive oil, salt and pepper. 
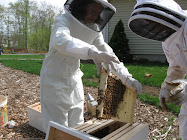
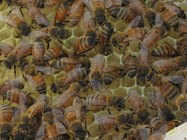
My bees were going bonkers yesterday. Orientation flights in the afternoon. It was crazy over there!!
See the butt of the honey bee sticking out of this apple blossom?

Monday, April 12, 2010

Welcome Spring!

Spring has sprung! There is evidence and excitement all over our yard . . .

Rhubarb (now in it's 3rd spring) is showing itself . . . 

Swiss Chard, overwintered in cold frames are looking fabulous . . . 

Strawberries are coming to life and have been thinned and strawed . . . 

Hens (now almost one) are in the full swing of laying motion. Here is Pearl, our best layer.

The hens have been in trouble recently though for raking the nice straw in their nesting boxes, out with they big ole feet!! Silly hens.

This is probably Elizabeth, our medium sized Barred Rock. 
The Rocks were very keen on investigating this camera business . . . 

Garlic (4 varieties) planted in the fall is looking healthy! Can't wait!

Asparagus (3rd spring) is ready to start picking daily. A wonderful thing.

My honey bees are a-flyin' -- pictured here on a peach tree.
Both hives have made it through the winter.
One has symptoms of Nosema, so I've treated both hives with medicine. Both queens are laying, and there is fresh brood in both hives. We actually saw baby bees being born when we went in for the first time last week! 

One of my dwarf peach trees in bloom.

A plum-cot tree in bloom. (plum & apricot combined)

Wednesday, October 7, 2009

Pepper Jelly Recipe

Pepper Jelly is particularly yummy over cream cheese served with crackers, as an appetizer.
You can also mix the cream cheese together with the pepper jelly for a dip.


(I doubled the recipe listed below and used 1/4 pint jars ... so, for example I used 2 sweet bell peppers, etc.,)

1 cup ground sweet bell pepper, approximately 1 large pepper, including juice
2 to 4 T (depending on how hot you want your jelly, I used 4) finely chopped jalapeno peppers (I used cayenne, jalapeno and sereno)
3/4 C cider vinegar
1/2 C water
1/8 t salt
2 T lemon juice
1 box standard powdered pectin (1 3/4 oz)
2 1/2 C sugar

Seed the sweet and hot peppers (chop, then measure) and then throw in a food processor until "ground", put peppers and the juice into a large pan. Add in and stir together: vinegar, water, salt, lemon juice and pectin. Set the heat on medium-high and bring to boiling. THEN add in the 2 1/2 C sugar. Bring again to a full rolling boil that cannot be stirred down; boil hard for 1 minute. Remove from heat, skim froth, stir. Ladle into sterilized (boil 20 minutes) hot (from being sterilized) 1/2 pint jars, leaving 1/4 inch of headroom. Thoroughly wipe sealing rim of jars with fresh paper towel, put on prepared disk lid, and screw the bad down firmly. Process in a covered pasteurizing water bath at 185 degrees for 10 minutes. Remove jars and set on a dry folded towel where they can cool upright and naturally.

Yum. Yum.

Cooking Edamame

Aren't they cute? These are edamame picked fresh from my garden. I made them on Sunday to compliment the Patriots game. They were so yummy. I planted these at some point in August, and they are finally ready for picking -- just in time before the frost comes. Chipmunks apparently love Edamame seedlings, and ate several baby plants. But I ended up with enough to keep me cheerful.
I searched online to see how to cook them. It seemed as though they'd be pretty straight forward, but I just wanted to be sure. My favorite explanation was created by a young Japanese woman on YouTube. She was quiet and simple during the presentation, but the best part was that she had obviously learned to cook from her mother or grandmother using observation instead of time to determine 'doneness', and other tips. She said the way to know if your edamame are done, is by looking to see when the pods crack open slightly. Then, she insisted that to cool them off, don't use cold water as this (apparently) hurts flavor. Rather, she fumbles through a cabinet, and whips out a hand held fan to cool them (like everyone must have fans hiding in their kitchens, at the ready). I thought that was priceless. Of course I've been cooling beans with water, even ice water, for years, but I dutifully used a folded piece of paper to cool my homegrown edamame.

Basically, you put about 1 T salt into a pan of water (filled enough to be sure the beans are covered with water) and bring to a boil. When the water is boiling throw the beans into the water for 4-5 minutes (when the pods start to crack open slightly). Drain. Fan to cool, gently stirring to give them all a chance in front of the fan. Toss with one teaspoon or so of kosher or coarsely ground sea salt. They were so yummy, and I was so proud!

Here is the YouTube link: Kirin's Edamame
Take a look at her modern spice drawers -- I want one!

Thursday, October 1, 2009

Disobedient Hens

Do you remember this?
I do. Victor and I worked our rear-ends off to make a protected area for our little hens.
Don't you know that now as many as five of them at one time hop out (flapping, half climbing up the fence) at will and peck around the yard.
Ahem . . . why did we bother?!
They were hopping out so frequently, and so many of them, that one late afternoon Benjamin and I let them all out figuring they'd stay close to home and come home easily at dusk. Nope. Those hens started trekking deep into the woods like a group of mountaineers beginning a expedition to climb Mount Washington. We had to pull out the stale hot dog buns and have Benjamin and Ripley coral them back towards the yard like sheep dogs -- luring them with crumbs. Bad hens.
To top it all off . . . we have no eggs yet. This is the week they start to lay. We are waiting.
Not too patiently.
Victor is already starting to talk about soup . . . and I don't mean egg drop.
We do have pole beans, harriot verts, dried beans, parsley and tons of arugula though!

Wednesday, September 16, 2009

Free-Form Raspberry-Rhubarb Tart


As you may recall, this spring we planted 12 raspberry plants this year. Some are early bearing, others later -- which is nice because you get a steady flow of gorgeous raspberries. On the first year you can't expect to get much of anything, but perhaps because of all of the rain we received, we have a nice little smattering of raspberries. Even though I figured my rhubarb was tough at this point, a found a few relatively new shoots and cut them off. Together with the raspberries I made a free-form raspberry-rhubarb tart. Boy was it good.

For the filling, a free-form tart is great because it doesn't have to be a certain size and you can just try different things. It takes a lot less time than a pie, and is smaller.

I added:

Approximately 1 1/2 pints of raspberries
4 small stalks of rhubarb, thinly chopped
1/4 cup sugar
1 T flour
shake of cinnamon
shake of nutmeg
few slices of butter for the top
sprinkle sugar on top, including crust part.

mix all of the non-fruit ingredients together first, so you don't damage your raspberries too much when you mix everything together. Then add your fruit and gently fold to mix.

PreHeat oven to 425 degrees.

Basically, you use your favorite pie crust recipe (just for one crust). Roll out into a rectangle shape (or small circle, just as long as it could fit on your cookie sheet). Flip onto a cookie sheet. Pour your filling into the middle. Flip the edges of the tart up and onto the filling with a knife (a flexible one is helpful, like a frosting knife). Make sure that any holes on the bottom edge are pushed back together with your knife or finger -- otherwise the syrup will ooze out. Once all of the edges are flipped up and over onto the tart, put a few thin slices of butter on top, sprinkle with a little sugar and pop it in the over for 25-30 minutes until the filling is bubbling and the crust is golden. Cool slightly (so the filling isn't too soupy) and EAT. Yumola. So good. We serve with vanilla icecream. Enjoy!

Friday, August 7, 2009

The Good, Bad and the Sad

(Just a portion of my potato harvest.)

Well, it was another day in the garden, yard and hives.


The Good News:

My right bee hive is thriving. I put on another honey super (now I’m up to a total of three). The bees filled up the second honey super I’d put on two weeks ago, after having to build comb on wax foundation. When I put the second honey super on, I moved the filled honey super to the top and put the empty honey super just above the two brood chambers. This way the bees feel they have plenty of room and don’t become “honey bound”. I should have a good amount of honey from this hive. Before I harvest the honey I have to wait until the bees have capped (put a thin layer of wax over the top of) the honeycomb. Once the honey is capped, you can be assured that the honey is fully prepared and won’t ferment.


My hens are 14 weeks old now. So far we don’t have a crower (aka: Rooster). I read online that roosters can begin to crow as late as 20 weeks, particularly if they don’t have an older chicken to learn from, but generally they begin to crow around 8 weeks. Time will tell. At approximately 20 weeks (the end of September) they will start laying eggs. How exciting!


I have a LARGE amount of potatoes! I harvested them yesterday. My sister-in-law roasted some up with garlic, olive oil and salt for dinner last night and WOW were they good!!


The Bad News:

The reason I harvested my potatoes is that I had THE BLIGHT! Ugh. I’ve been watching my tomatoes and potatoes and didn’t see the tell tale spots on the leaves, but when I went back to work the garden yesterday, it was obvious. The leaves were all dying off, there were large brown spots on some of the tomatoes and stems. Sad. Even if I were to have tried to spray organically to fight the blight, I have a hard time believing that with all of the rain we have received, that the spray would have been able to stay on long enough day to day to be effective. I don’t know. It’s been a bad year for rain, bugs, plant disease, heat-loving vegetables and fruits, and trips to the beach.


So yesterday I pulled up all of my potatoes out of my strange potato towers (it is fine / safe to eat tubers (potatoes) from a plant with blight), and Victor helped me by pulling up all of our tomatoes -- all of those doomed green tomatoes -- all of the effort of nurturing the plants from seed. Bummer. Well, at least now I have plenty of room in my garden for lettuce, beans, carrots, beets, etc., etc.!!


The Sad News:

I mentioned recently that I’ve been concerned about my left hive. Something just wasn’t right. They were slow to build out the wax foundation (make comb) on the brood chambers (there are still about four frames that aren’t finished within the two eight frame brood chambers). Maybe my novice eyes just missed a poor brood pattern? (I guess I did mention my concern about it in my last post.) There were bees being born and capped brood, but perhaps I was missing the severity of its weakness. They’d fallen behind the right hive and then really took a major turn for the worse over the last two weeks. So, I had my wise bee friend Diane come over to look at my hives yesterday. The bottom line is: I no longer have a queen in that hive. It’s been about 2 1/2 weeks since I did a full inspection where I looked at every single frame in the hive. What we found were 4 small swarm cells, and 1 small supersedure cell. Diane felt they almost looked unfinished because they weren’t as long as she’s seen. But what we didn’t find, is a new queen of any kind. So perhaps she is right, the bees tried to make a new queen, but by that point the hive was already too weak. Sad. The good new is, I am getting a new Italian Queen from a local guy in Rhode Island on Saturday morning. I wish he had some Purvis Goldline “organic” bees available, but he doesn’t and Purvis only ships out on Wednesdays and my little hive can’t wait that long. So, I’ll have to live with an Italian. Hopefully she’s nice.

Monday, August 3, 2009

The Month in Review


Family:
Every Tuesday night is "Family Night". At my parent's condo there is a kid-friendly event and buffet dinner. It's a low maintainence evening that gives us all the chance to spend time together and if the weather is nice, catch a swim in the pool before hand. It has become a tradition to take a picture of all of the grandchildren sitting together on the couch. It's quite a production -- getting all of those kids to smile at the same time. I should video all of the adult shinanigans we go through and post it on You Tube for a good laugh.
Reese, Ripley, Rosalie, Benjamin and Spencer
An impromptu back massage chain. I think Mom is enjoying hers the most.


The Beach:
We are blessed to have a tiny "bungalow" a short walk away from the beach where we stay all summer long.
The best part of our summer is when friends come to visit and enjoy the outdoors along with us.
Isn't it lovely?
Ripley and Ian
Michail and Benjamin
Victor and Sandy
Victor
Sandy and Michelle
The traditional ending to a wonderful summer evening with friends . . . The Roasting of Marshmallows.


Our Friends Vivian and Jacob rented a little place close by for several days . . . It was wonderful to have dear friends around town to "play with".

It is a photograph like this that keeps me at home. I love that my children have time in the summer to read, relax and play -- unstructured, creative.
The Fourth of July
Cousins:
Ripley and Rosalie

Road Race:
Benjamin, Ripley and I ran in the local Road Race.
The kids ran the "Fun Run" and I ran the 4.8 miler.
Here I am with some of my running buddies.
Courtnee, Susan, Chris, Vivian and Sandy

The Garden:
It has not been a banner year for gardening. We have had record rainfall for both June and July. July's record was blown away by 2 inches. We just haven't had a lot of hot sun.

I was however, able to harvest a bunch of carrots!

I harvested the balance of my garlic, braided it and allowed it to cure hanging up in the garage.
It tastes great! Success!
The Bees:
Although I don't have recent photos of my bees, I'll give you the brief low-down.
My right hive is thriving. In spite of the weather. I have a full box of honey on top of my right hive, it's busy and packed full of happy honey bees.
My left hive is not so happy. I put some sugar water on last week to give them an extra boost, because up here a lot of people have had to feed them all summer so far. They are starving. I have my faithful bee friend Diane coming over to take a look at this hive. I want to be sure the queen is in there and laying well enough. I'm concerned that the pattern of eggs being laid was poor -- but I certainly can't profess to be an expert at this point! Fewer bees, less progress building out comb in the honey super, and a lot less activity in front of the hive. Stay tuned!

Regrets:
Sorry for being out of touch. Where we stay in the summer (I visit our Rehoboth home once a week and race around like a mad woman trying to get things done) we have only our cell phones, no cable, no internet, and only one t.v. station through old fashioned rabbit ears. The good news is, we are all doing a lot of reading! I've just finished: The Reader, Sarah's Key, Empire Falls and The Help. Our book club picked a 'light read' for August -- so I've just started Twilight albeit a bit half-heartedly. It's quite the rage, so there must be something to reading about vampires . . . right?

Friday, July 10, 2009

My First Garlic Harvest

As I have noted, it's been rainy around here. I've read that some people have harvested their garlic early for fear of it rotting underground. You are supposed to harvest your garlic when 50% of the leaves turn brown. I planted three different varieties, so as it just so happens they are browning up at different speeds. I decided to harvest my first variety called: Stuil. All of my varieties are hard neck because I had read that these varieties do better in my colder climate. I may try a soft neck variety next year, just for kicks.

Here is my harvest!
My brother Scott (the photographer) quickly printed off directions for braiding garlic off the Internet. If you have ever made a french braid before, that's how you braid garlic. Of course the green / brown stems are stiffer than hair, but after awhile I got the hang of it.
You lay your next stem of garlic down parallel with the next group of stems to be pulled across to the middle.


It may not be the prettiest braided garlic ever, but not bad for my first effort.
I hung it up in my garage, and let me tell you, as you walk towards the garage door, it smells like a garlic festival is underway.