Showing posts with label Starting your own seeds. Show all posts

Tuesday, May 12, 2009

Fragile hope and a commitment to thinning!

I feel like I'm walking on egg shells. I am waiting for 'the other shoe to drop'. I am giddy with excitement when I look at my thriving strawberry plants (thanks to our handy dandy fence that's keeping the rabbits out!), but I am petrified that something is going to come along and ruin everything before they are ready! I am having pest stress! 
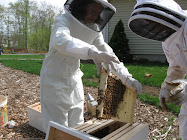
Just last night I was examining my fruit trees and found that some of them have been anialated by a small green caterpillar. I tried picking them all off one by one and smashing them to smithereens. But, they were everywhere. Nearly all of the leaves had been destroyed, overnight. Finally I broke down and used an organic BT spray, which is a bacterium that disagrees with soft bodied bugs, on the trees whose flowers had already fallen off (kind of like the milky spore concept that's used for Japanese beetles). I didn't spray anything on those trees that had flowers because there is some talk that the BT bacterium may harm the larvae of the honey bee -- as the bees go right to the flower, take in the pollen and nectar, then feed it to their young -- which is at one point, larvae. 
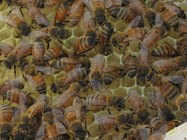
So of course I haven't sprayed my darling strawberry plants. But they are starting to show evidence that some bug or other is going after them. Argh! Garden Stress! They look so wonderful. So cheerful. So hopeful. I even saw one of my honey bees examining them yesterday. (Granted, one -- but hey! We are getting somewhere!)
My mantra this year is THIN THIN THIN. The sign of a novice gardener is someone who doesn't thin their seedlings. I fall into this category. I find it so difficult to pull out or cut down a cute little seedling filled with promise! This exposes my naivete. Although you might think that you will get more 'fruit' with more plants, if the plants are crowded the opposite is actually true. In addition the plants become stressed and more susceptible to disease. Drat. So now I have been thinning and thinning and thinning. 
I've known this since I was a child and witnessed my father pulling out 'perfectly good' radish seedlings from the ground. "WHAT are you Dooooooing??!!" I said. "Thinning" he responded. It just seemed so wrong. 
Here are my peas. (top and bottom) Two rows side by side 4 inches apart with a trellis in between. Last year my peas were attacked by deer and rabbits. We will see if the peas have better luck this year!
Here are my broccoli and cauliflower transplanted seedlings.
And some lovely lettuce that had been growing in my cold frames -- now exposed. It is pretty exciting to have lettuce ready for picking in early May (here in New England, that's exciting!)
Yum.
And my carrots. Another thing that suffered greatly last year because of Peter Rabbit. 
I've been a good girl and have been thinning them out as need be. 
One small potato sprout. Kristi and I are trying a new fangled potato tower made with wire fencing. Inside I've piled leaves, straw, grass clippings, compost and a little dirt. As the sprouts get taller, you cover up the stems with more of the 'compost cocktail' and repeat until you are at the top of the tower. Supposedly this will create a mountain of spuds within each tower. I am a little concerned about possible light exposure to the potatoes growing inside (on the edges) of the towers. Growing potatoes don't like light, and can 'green'. Time will tell. I'll keep you posted! (My Portuguese husband does not seem impressed.)

Monday, May 11, 2009

Your Seedlings


Have you been nurturing seedlings that you've planted indoors? I have. One word of caution. If it is your first year growing your own seedlings for your garden, before you plant them, don't forget to "harden them off". 

What is "hardening off" you ask? It means taking your tender seedlings outside to experience 'the real world' for a few hours every day for one to two weeks. This toughens them up and when a cooler night or a windy day happens by, they will be able to take it. 

I met a woman at a party last year who had grown an enormous collection of vegetables from seed. Once the middle of May came around, she threw them all in the garden and smiled. The end of May last year was very cool, but we didn't get a frost. This poor gal lost all of her plants. Every last one died. I had planted my seedlings the same week she had, and couldn't figure out why she'd lost everything. Then literally in the middle of the night I realized she must not have hardened her seedlings off. The next morning I called a mutual friend and told her my theory. Sure enough, she hadn't hardened off her seedlings. 

So, let it be a lesson to you. I know you want to plant those cute things you've been growing indoors for weeks now. I know there isn't any frost forecasted. But STOP. Take the time to bring your seedlings outside during the day, back in at night, for about a week. The longer the better, really. I have pushed it to five days before, when it was really getting warm and the forecast looked good. 

My father-in-law has planted his entire garden. It's not even the middle of May quite yet, and he lives north of Boston! He is newly retired so he couldn't hold himself off with all of the extra time he has on his hands. His potatoes and Portuguese pole beans are already sprouting! I am a little envious. (Okay, very envious.)

Even my brother and sister-in-law planted tomatoes and basil in their new raised beds in their city yard! So, yesterday I did plant one flat of basil in my herb garden but I will wait for the rest. I've worked too hard to get to this point. And frankly, I'm not quite ready! 

Friday, March 20, 2009

My Seed Progress

Here are a few pictures of our seed progress so far:
I planted plenty of basil this year. Last year I did too much waiting around to harvest again for pesto. This basil is 'lettuce leaf' basil. Just look at those huge floppy baby leaves!
Well, as you can see, I solved my dwarf tomato problem from last year.
It was simply too cold downstairs in my basement for them to grow well.
This year I have a small ceramic space heater that you can set at a certain temperature.
They are going nuts and I'm going to have bushes before May comes! Eeek!
These are my Chamomile seedlings. Aren't they cute?
The seeds are practically microscopic. You have to plant them by getting the seeds to stick to your finger -- then touch the soil and hope they all scrape off into the damp soil.
Pinching them with tweezers (like I use for some small seeds) is out of the question. 
They are just too small!
Just for the heck of it I planted some of the seeds I'd sown directly into the ground last year, to give them a head start. Here are a few beet seedlings.
Broccoli and Cauliflower
My pepper seedlings - and plenty of them.
The seeds I had on hand from last year I tried to use a lot of simply because I wasn't sure that they'd last through another year before planting (that would be three years old). 
Does anyone know the answer to this? I know onion and leek seeds only last one year.
More pepper seedlings.
My onions are all gangly -- does anyone know why?
My leeks are standing right up on end -- but not my onions. 
Hmmmmm.

P.S. - Like him or not, I was happy to hear that the President will be planting a vegetable garden at the White House. I know that Michael Pollan and Alice Waters have been pushing for this. I just hope it's more than four raised beds. 

Friday, February 27, 2009

Seedling Progress

As you know I have embarked on this years seed starting. Here is there progress, for your viewing pleasure.
Leeks
(Footnote: leek and onion seeds are only good in the first year. I learned this from Kathy, and then confirmed it for myself. So, go ahead, plant them all -- find a spot for them or give them away. Otherwise, the seeds will just end up in the compost.)
Floppy looking onions. This photo is a week old, they are looking perkier now.
Tomato seedlings. I love several varieties of tomatoes. Not great for seed saving in my smallish garden, but I can't handle just one variety. I went ahead and planted a bunch, many of which are from last year. I don't know if the seeds will last another year, so I went ahead and planted most of them remaining from last year. Gifts anyone?
I was just about ready to give up on the celery I'd planted, when . . . look what I found!
Same thing goes for the eggplant. I was just about to reseed, when . . . 

The more you work with God's creation the more you know He is real.
From the honey bee, to seedlings, it's all miraculous. Truly.

Tuesday, February 17, 2009

Seed Progress!

Starting your own seeds continued . . . 

As you can see, my leeks and onions have germinated and poked up through the soil. How wonderful! The other benefit of starting your own seeds is seeing that spring is coming in a very tangible (and hopeful!) way. 

A lot of books suggest watering your seeds from the bottom -- where you put water in the bottom tray and let it soak up through the soil and roots. That sounds good, and I get the concept, however after trying it on and off for years I always find that the water doesn't soak up evenly. So you have one side that's managed to get drenched, the other looks like one step from the Sahara desert -- or you'll have 3-8 cubicles that are bone dry. If I water from the top I feel like I have a lot more control and the "failure" rate is zero. I like those odds better. :)
I have started my tomatoes, eggplant and celery. As I've mentioned in a previous post, after starting my seeds (like tomatoes) 8 weeks before the last frost date -- as instructed in books and on the seed packets -- they were only two inches tall (at best) by the time I planted them. Too small. I think this is partly because it was too cold downstairs, but I'm not willing to have mini plants again this year. So -- I'm planting earlier. We'll see how it goes.
Some time this week, I will start my pepper seeds. I am planning on soaking them (for about 8 hours) before planting them. I did that with my tomato seeds and they are already starting to sprout. Exciting!!

It's not to late to start your own! Start small. But, get started! 

During school vacation week, it's a great thing to do with your kids. The younger ones can help stir water into the dirt, and scoop it into the flats. The older ones can drop the seeds into the holes that you make (at the right depth). It's surprising to learn how many children don't understand where their food comes from. You don't need a huge garden. Start with a small raised bed, or a small bed along the side of your house, or even some planters on your patio or porch. 

Have fun!

Wednesday, February 4, 2009

Starting Your Own Seeds

Here they are! The first seeds that I have planted for the 2009 season! Exciting. I am going to plant most of my seeds earlier than I did last year. They were tiny little seedlings by the time May came around. One reason may be that it was a bit too chilly for their liking down in our basement. Our basement is finished, but we keep the heat way down unless someone is down there playing. Soooo . . . I'm going to have to try and resolve that somehow. 

The first seeds I planted were from the onion family. Last year I planted leeks, starting them from seeds. Although their growing time is very long (100 days +) they were extremely low maintenance. No one wanted to eat them (bugs or rabbits or chipmunks or deer) and they just sat there minding their own business, plodding along. Even if you don't get to picking them -- they just keep on keepin' on during the entire winter. Wow. What a plant! Yesterday I planted: Siegfried Leek (winter hardy), Bandit Leek (winter hardy), Riverside Onion (stores for 5+ months, smaller) and Siskiyou Sweet Onion heirloom (cold hardy to -10 degrees, but not a good storer, large flat 5-7" bulb). 

Planting your own seeds is simple! And cheaper than purchasing seedlings. Plus, you will have a lot more variety to choose from when purchasing seeds from seed companies.  

  • First, buy flats for planting your seeds into. I saved all of mine from last year. With good care they should be able to last you many years. Plain Old Kristi was very resourceful about saving all kinds of containers to plant her seeds into. Check out some of her ideas here.
  • Buy seed starting soil. Lighter than potting soil, it's best for seeds. Or you could mix your own by combining potting soil, compost and peat moss or leaf mold. I am hoping to make mine either next year or the year after depending on how my leaf mold compost bin does.
  • Buy your seeds. It's not too late! I have been happiest with my seeds from Seeds of Change. Abundant Life Seeds and Johnny Seeds have also been very good. In these catalogs there are a wide selection of vegetables and fruits -- with several different varieties of each kind. 
  • Fill a bucket with an inch or two of water, dump soil up to the top of the bucket, drizzle a little more water on top and toss. This is a great job for the kids. Ripley was my soil stirrer. 
  • Fill your containers with soil. (Another job that Ripley did.) Pack the soil down lightly, so that when you go to take your little seedling out, the whole clump wont fall apart. Plus, soil compacts a bit and your seedling will need some soil to sink it's roots into.
  • A good rule of thumb, in general, is to plant each seed in a small hold double it's size. So if you have a small onion seed that's just under 1/8" wide, plant it in a hole 1/4" deep. But this information should also be on the back of the seed packet. I made my little holes with a pencil. 
  • Drop your seeds in the holes and gently cover and pat each seed with soil. 
  • Plant more seeds that you think you will need. Invariably you will have some fatalities or seeds that just didn't "take". Plus, seedling make great little gifts to friends! 
  • Cover your seeds with a plastic top, or plastic wrap, or plastic bags (lifted off the soil with Popsicle sticks or twigs) to keep the soil evenly moist. This isn't imperative, but it keeps the maintenance lower (really no need to water in this stage if the top is on). 

  • Seeds with a hard "shell" on the outside sprout even more reliably with soaking. Soak for 4-8 hours in a little water at room temperature. I have not done this with all of my seeds. But frankly, it's a little bit of a pain. The seeds stick to the bowl, and it's tough to drain the water without losing a few seeds. I had several different types of peppers and tomatoes (the seeds that I soaked) and I had every small custard cup and bowl out trying to keep them separate and their varieties "tagged". This is not necessary, but it is supposed to help your seeds along, particularly more challenging seeds. I'd say, if you are up to it, go for it, if not -- bypass this step. 
  • Another sure fire way to get your seeds to sprout without worry is to put them on top of a heating pad set on low. This is a miracle worker -- particularly if you live up north and keep your house cool. Many seeds need to be at least 70 degrees in order to germinate (this information should be on the back of the seed packet). I wish my house was 70 degrees! But it's not. Humph. 
  • Once your seedlings have sprouted, take off the cover and put them in a very sunny window or under a fluorescent light. In our house, we only have one window with southern exposure -- and it's in Ripley's room! So I had to use fluorescent lights. I bought these cheaply at Home Depot last year for something like 9-14$ apiece. It's a one time investment. Not a big deal. The light needs to be lowered to 6" above the seedlings. I have my lights suspended with sturdy string that is looped through hooks that are screwed into the wooden beams in my basement's ceiling. 
  • The directions on the back of your seed packets will tell you how many weeks before your last frost you should start your seeds indoors. The directions will also tell you if it's best to sow them directly into your garden (root vegetables for example). Some vegetables are very easy to plant outdoors and quick to grow, so they don't merit the effort to start seeds indoors ahead of time. Examples of these are: Beans, Peas, Cucumbers, Squash (summer and winter), and lettuce. Directions on the packet will also tell you when it is safe to transplant the seedlings outside or sow directly into the soil outside. For most vegetables, this will be after the threat of frost has past. However others, like peas, beans, lettuce, and other cold weather greens can be sowed earlier.
  • Now, once your seedlings are ready for planting STOP! It is necessary to go through a period called "hardening off". That means that a week before you are ready to plant your seedlings, bring them outside for several hours, then bring them back inside -- for 7 days, give or take. If you don't do this, there is a very good chance that your new seedlings will die in short order. This process builds up the seedlings resistance to wind, colder temperatures, outdoor sunshine, etc., etc. 
I hope these directions help -- especially for those of you who are hesitant to grow your own vegetables. It's just not that hard. Start with easy things like lettuce, arugula, kale, beans, tomatoes, cucumbers, squash, herbs such as basil and parsley (only the tomatoes should be started from seed indoors). Or start very simply with ONLY those things you can easily sow directly into the soil. A girlfriend of mine started a small kitchen garden along one side of her house. She had more lettuce, cilantro, cucumbers, tomatoes, and parsley than she knew what to do with. Of course this year she wants to expand! Beware, growing your own food is addictive! And, that's a good thing. :)