Thanks to Rhonda Jean from Down to Earth for The Biggest Kitchen Table: Discussions on Simple Sustainability. This Kitchen Table Topic is about Preserving and Canning. What a fabulous idea!
Last summer was the first time I've canned / preserved. I've had a large garden before in my previous home, but just last year had the opportunity to expand from two raised beds. Last spring we put in a large garden (in addition to the raised beds) and a small orchard along my side yard. Both of these areas replaced grass that we no longer have to mow. We have one large patch of grass left in the front yard for the boys to play sports.
In the garden I planted perennials such as rhubarb, asparagus and strawberries - all of which I should be able to harvest from this year. (Strawberry-Rhubarb Jam anyone?) In the orchard, I planted 3 apple trees, 2 pear trees, 2 peach trees, 1 apricot tree, 1 Bing cherry tree and 6 blueberry bushes. I am looking forward to harvesting and preserving these fruits in the future.
While my trees, bushes and perennials were in their infancy last summer, I grew about 20 tomato plants among many other vegetables. I checked out a canning / preserving book from the library, purchased some canning jars and got busy. For all of my tomatoes I used the water bath method of canning. I had purchased a pressure-canner, but to be completely honest, it looked (and the directions seemed) so intimidating that I didn't use it all summer! Isn't that horrible?! Well, anyway, I canned both whole tomatoes and tomato puree. The thing about the whole tomatoes was, even though I packed them down with all my might before sealing them and putting them into the water bath, when the jars of whole tomatoes came out of the bath, they had settled down lower than the amount of space you're supposed to leave at the top. Hmmmm. (Input anyone?) I was very nervous about using my first canned tomatoes. I studied books and articles online to recognize canned food gone bad, like I was studying for a bar-exam. I'd never done it before and pretty much taught myself (and asked a good friend a few pertinent questions at the last minute), so I didn't have a lot of confidence that everything would work out well. But guess what?! They were fabulous. When I opened my jars through the winter (I just used my last one, last week -- alas.) the seal was super tight and the tomatoes smelled fresh from the garden. Wonderful!
The other thing I did with my large harvests of tomatoes was dry them in my new dehydrator. I tried making sun dried tomatoes the old fashioned way in the sun over 3-4 days, but before they dried completely, mold struck. I think it's just too plumb humid over here in the northeast. It's tough because you need several days in a row of perfect sunny days with low humidity. Colorado would be perfect. Massachusetts . . . no so much. After my failure, I invested in a dehydrator. It was quick and easy to slice loads of tomatoes and line them up on the dehydrator shelves. They have kept well all winter long (just used up the last jar) and we've enjoyed our own tomatoes in our favorite pasta dish. Next year I will be doing even more with my dehydrator. Tomatoes, Fruits (for granola), Herbs, Herbal Tea. I can't wait.
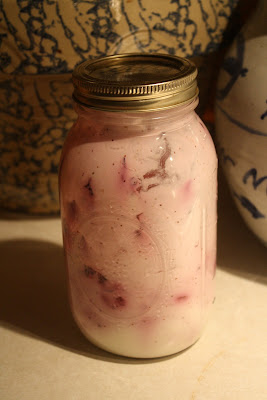
The other thing I canned / preserved last year was jam. I have a big PB&J guy here, so I figured I'd save by picking my own strawberries and blueberries, and making my own jam. Plus, I was hoping that, like with most things, when they are homemade they taste even better! The wonderful thing about preserving jams is that as long as the fruits are high acid fruit, you don't have to run them through a water bath or pressure-canner. You simply sterilize the jars, make your jam, load them up to the correct height, run a spatula around the sides to make sure the air bubbles are out, put the tops on and let them cool. Voila! Jam! My strawberry jam came out the best. I could eat it right out of the jar and the strawberries taste so fresh.
Here is the recipe:
Strawberry Jam
7 lbs. strawberries, hulled
8 cups sugar
1 lemon, zest and juice
1 1/2 T balsamic vinegar
Put all ingredients in a large pan. Bring to a boil for about 5-8 minutes until you have reached the setting point. Put into sterilized jars. Yum. Yum. Yum.
Link Rhonda Jean's blog here to read other posts on canning and preserving HERE.


